
Our two oldest boys begged us for years to build a backyard treehouse. When we finally gave in, Josh and our oldest son did a lot of planning and drawing to figure out the best way to build it. They had a lot of fun with this step of the process, and it increased our boys’ excitement for the treehouse dream that would ultimately become reality about a year and a half later.
Yes, it was a long and drawn out process with lots of months-long hiatuses when other priorities prevailed. But I am happy to report that our treehouse that was just a dream in the Spring of 2019 finally came to life in the Fall of 2020!
This post contains affiliate links, which means I receive a small commission, at no extra cost to you, if you make a purchase using a link. Please see my disclaimer for more details.
Planning for our backyard treehouse
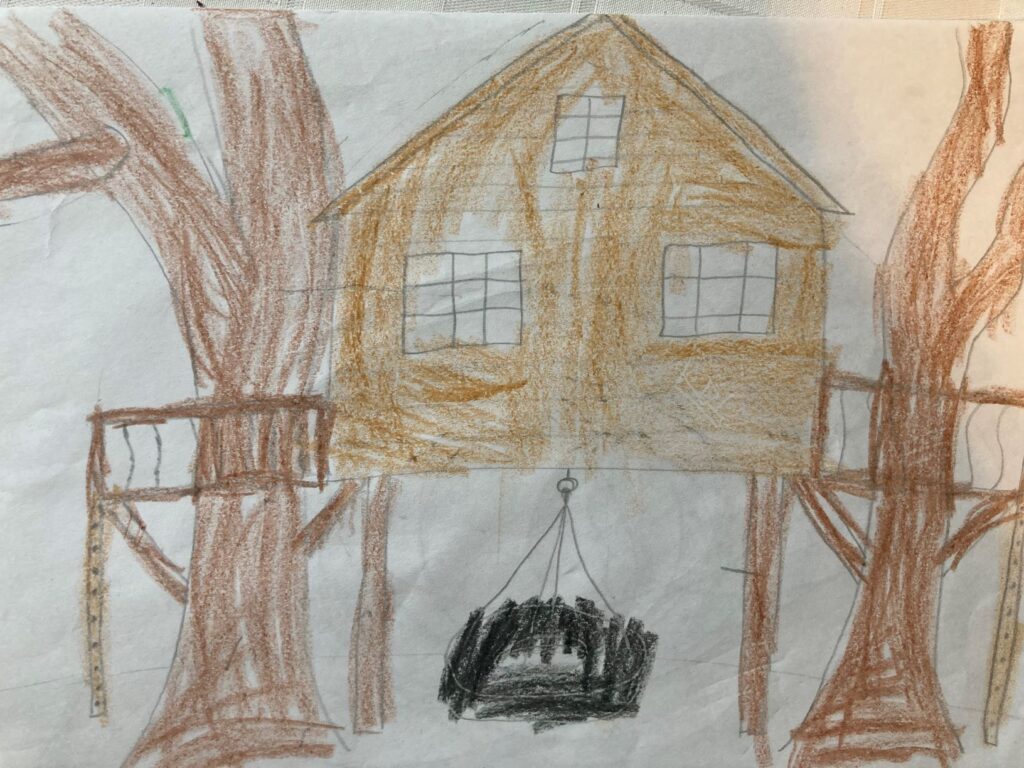
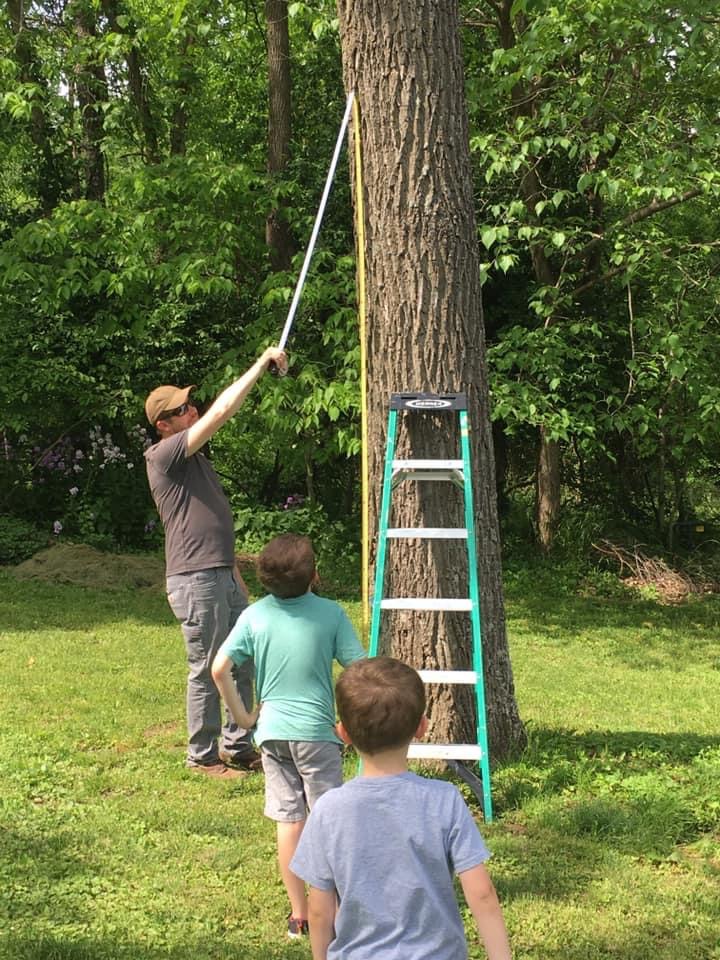
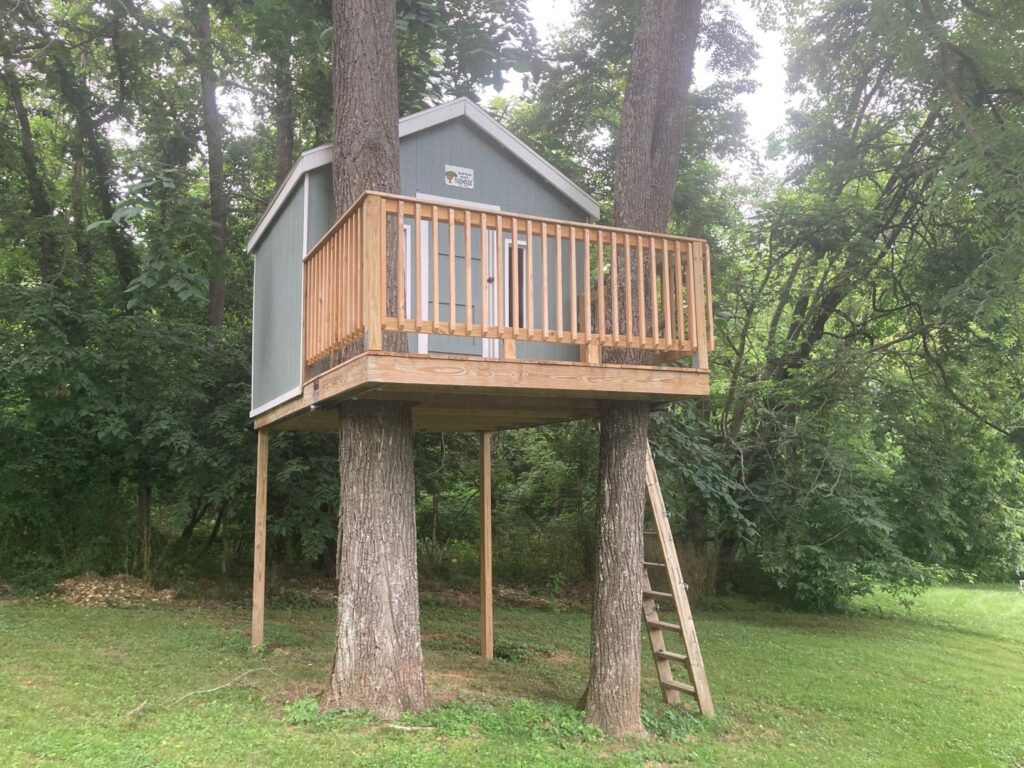
We set our sights on two walnut trees at the back of our yard. After taking some measurements, they decided the front porch would wrap around the trees, and the actual house would sit behind.
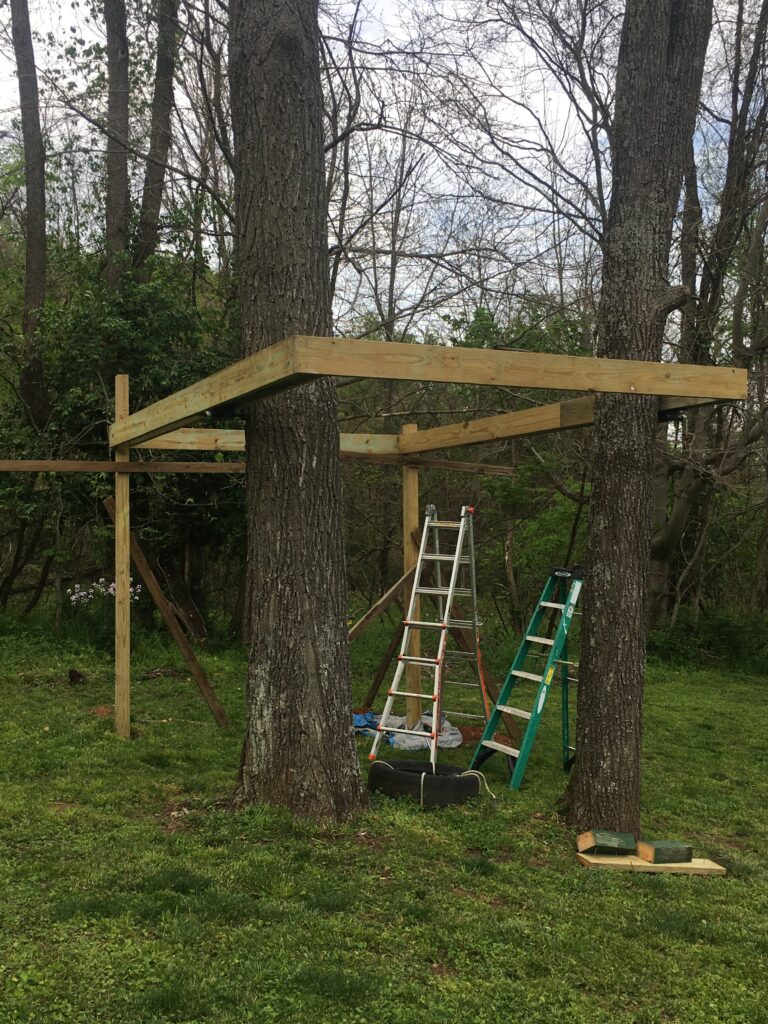
building a solid foundation for the treehouse
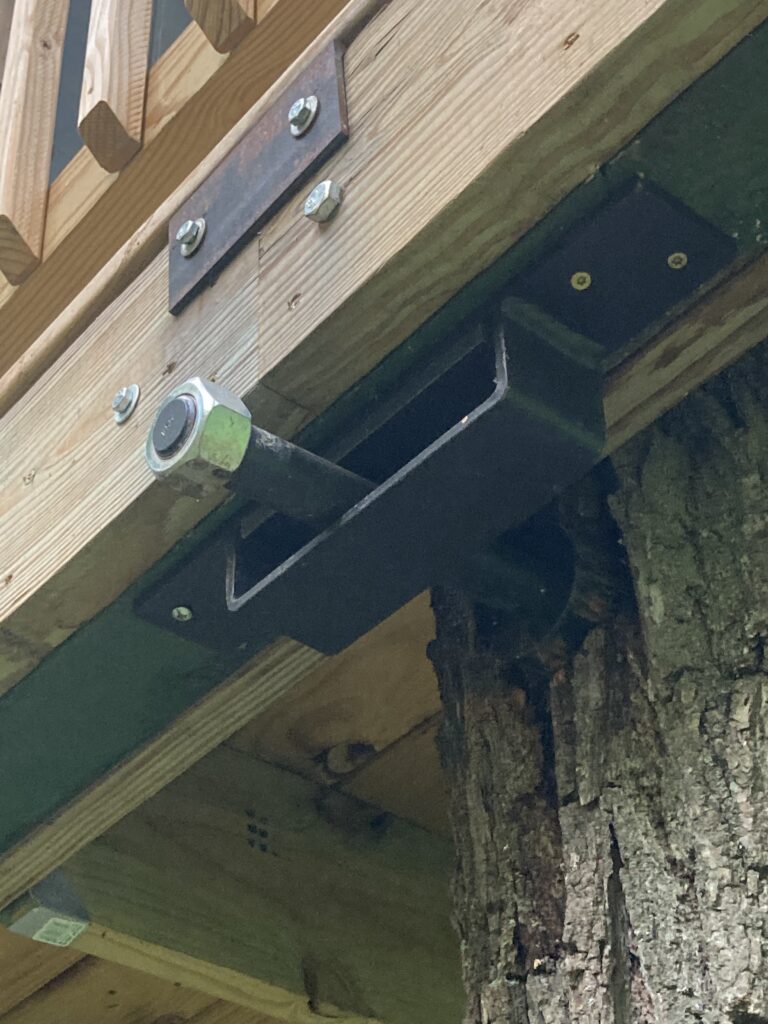
We purchased treehouse hardware from treehousesupplies.com including the attachments bolts and brackets. The attachment bolts effectively drill into the tree with the ability to hold thousands of pounds each. The bolt runs through a bracket which allows the tree to grow and expand. We used the brackets for the base of the framing at the front of the house. We also set two posts in concrete during this initial build phase for the back of the house.

constructing the deck and framing the walls & roof
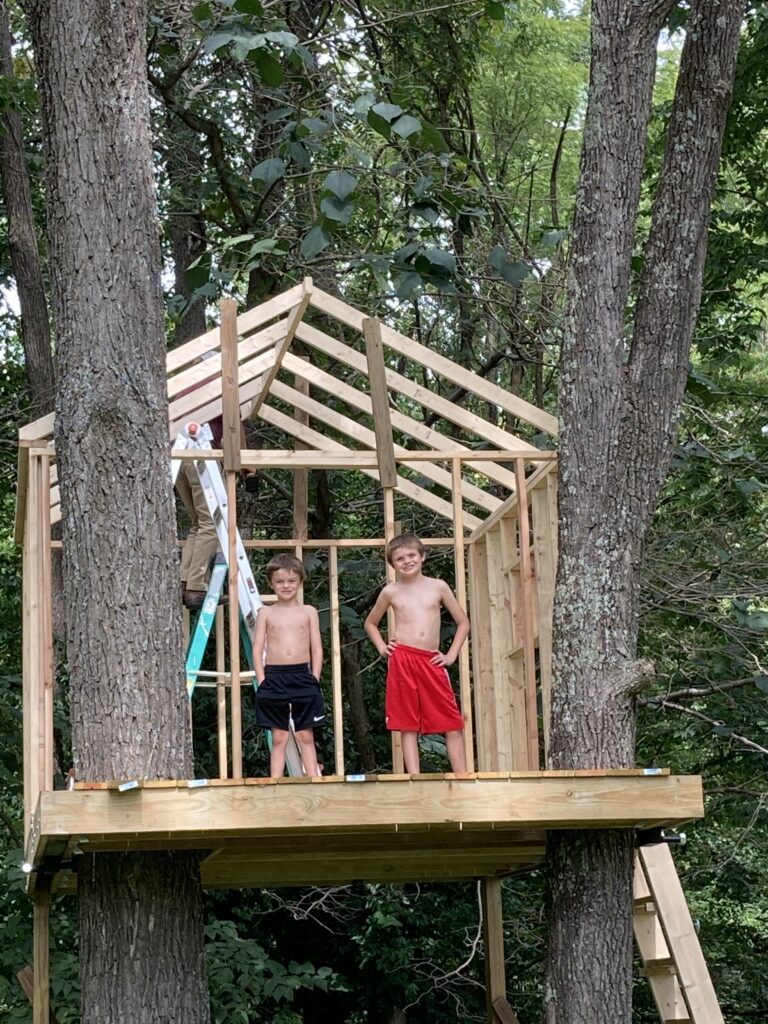
In this next step, we built the frame and squared up the floor. This turned out to be much more difficult than we expected, and took some tweaks and re-dos to get it just right.
A big part of the process was finishing the floor joists, laying the floor, and framing up the walls.
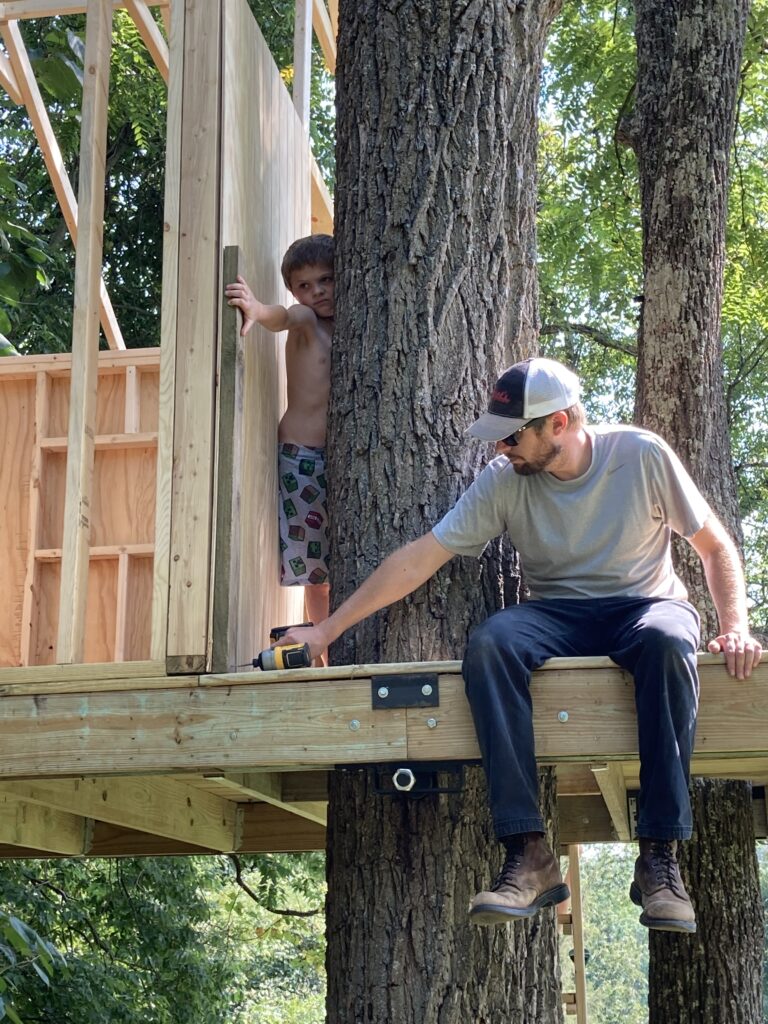
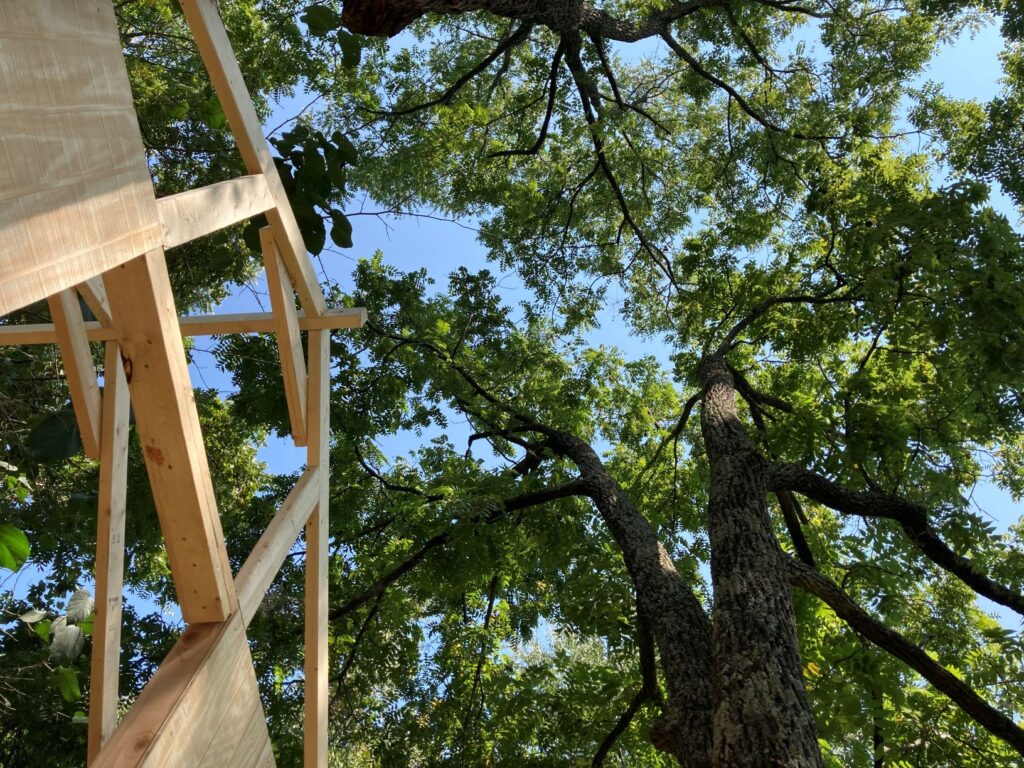
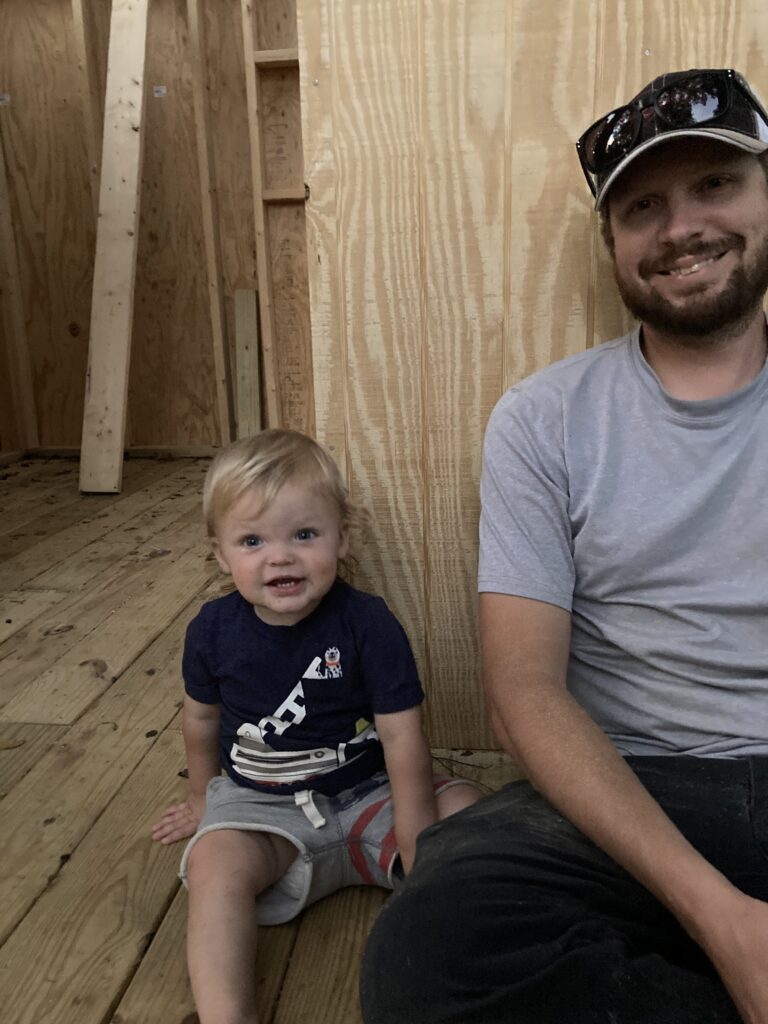
Then I took this opportunity to lay on my back and take in the view up above. I also caught Josh and our little guy taking a break to admire “their” work so far.
finishing the treehouse exterior envelope
I didn’t do a good job at all of documenting these steps of the process, but to finish it up we still had a lot to do:
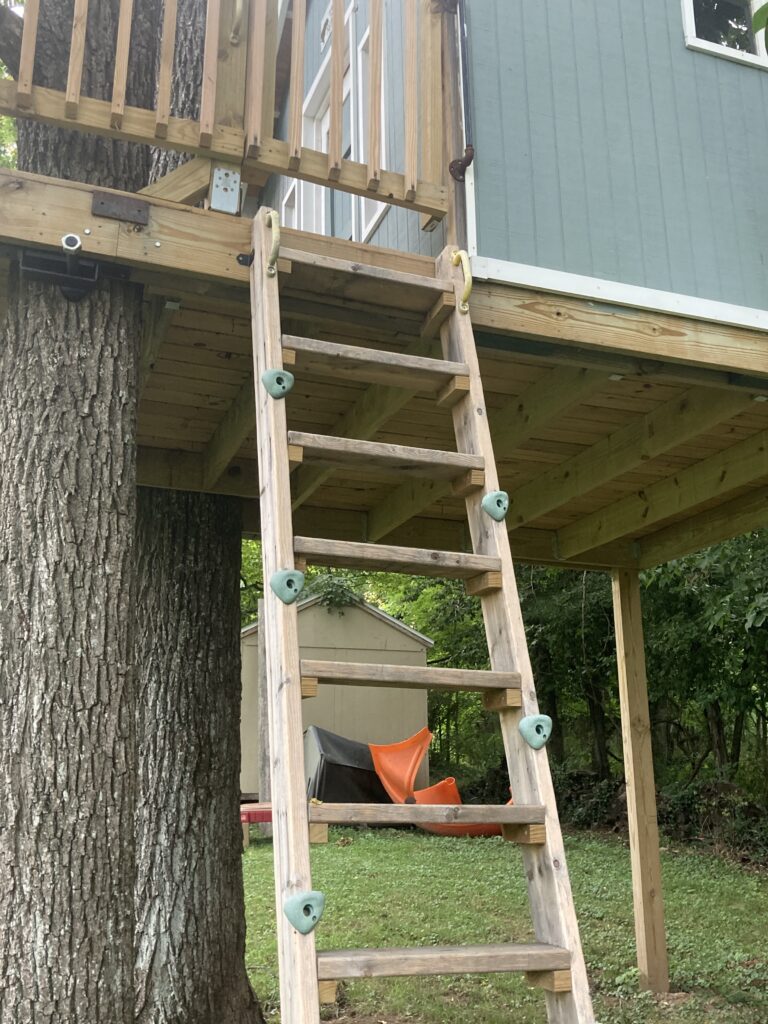
- Add the deck railing
- Build the ladder complete with climbing holds
- Put up the plywood panel siding
- Construct the roof and shingle it
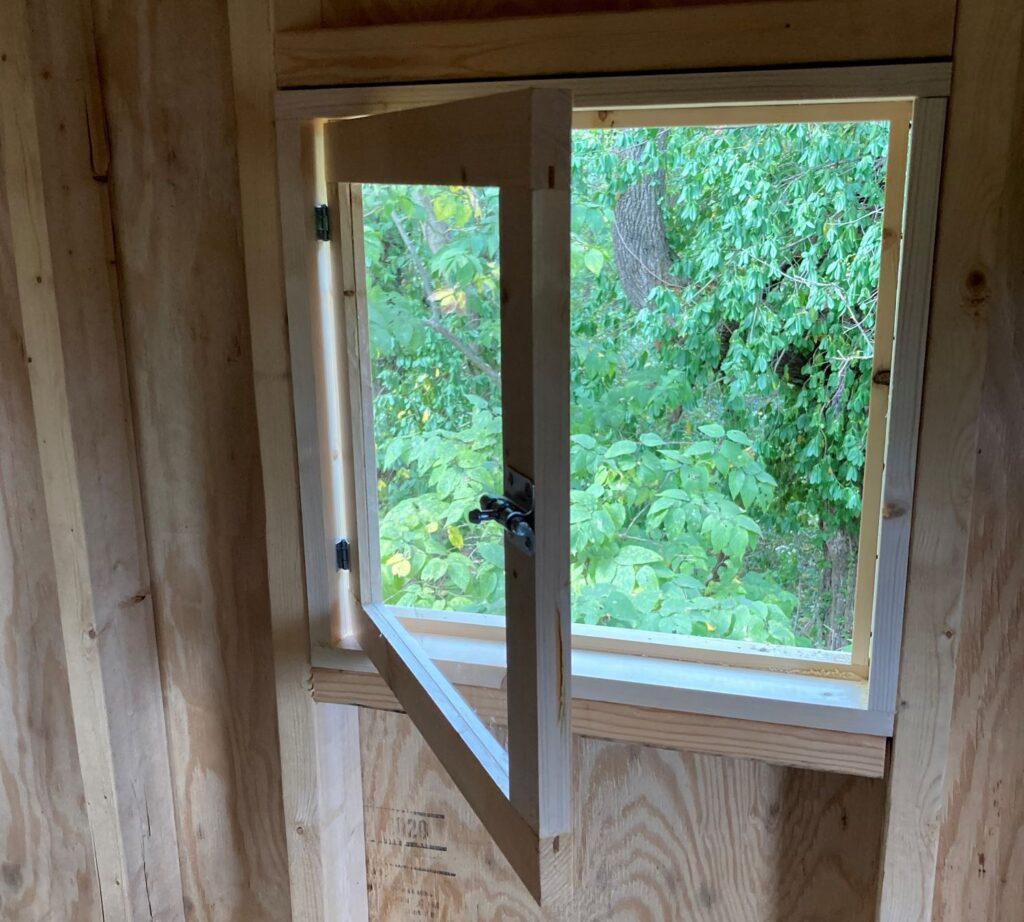
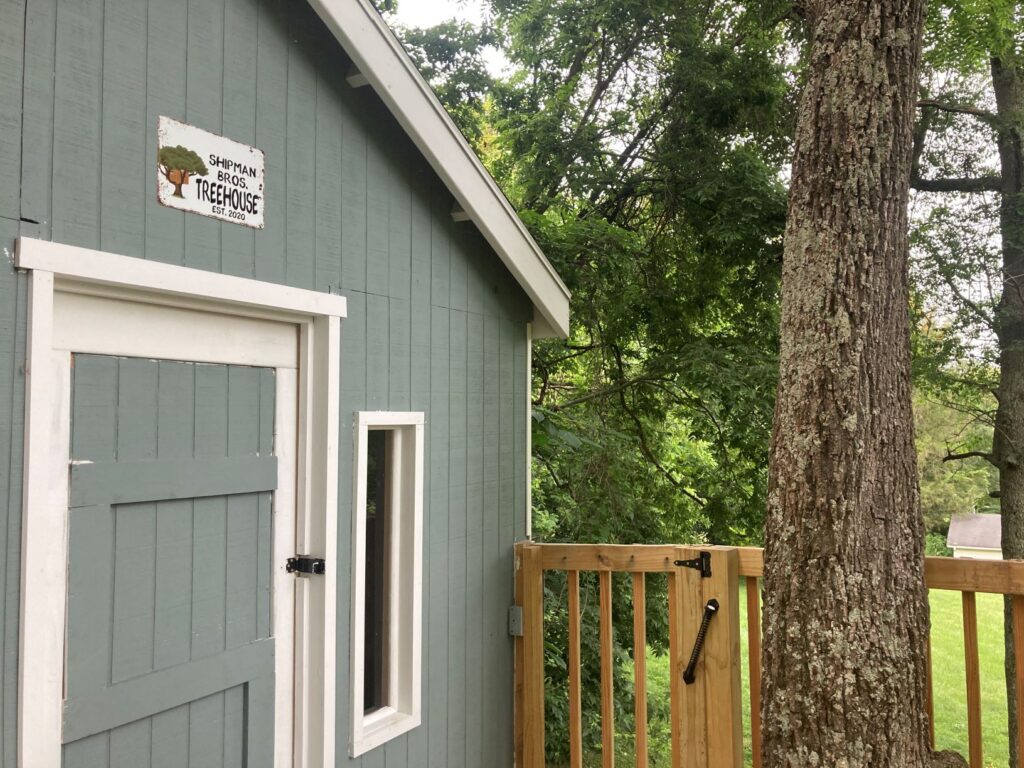
Josh even went all out and built his own front door, front plexiglass windows, and side/back windows that open and close on hinges. (I’ve probably failed to mention thus far how particular the man I married is!)
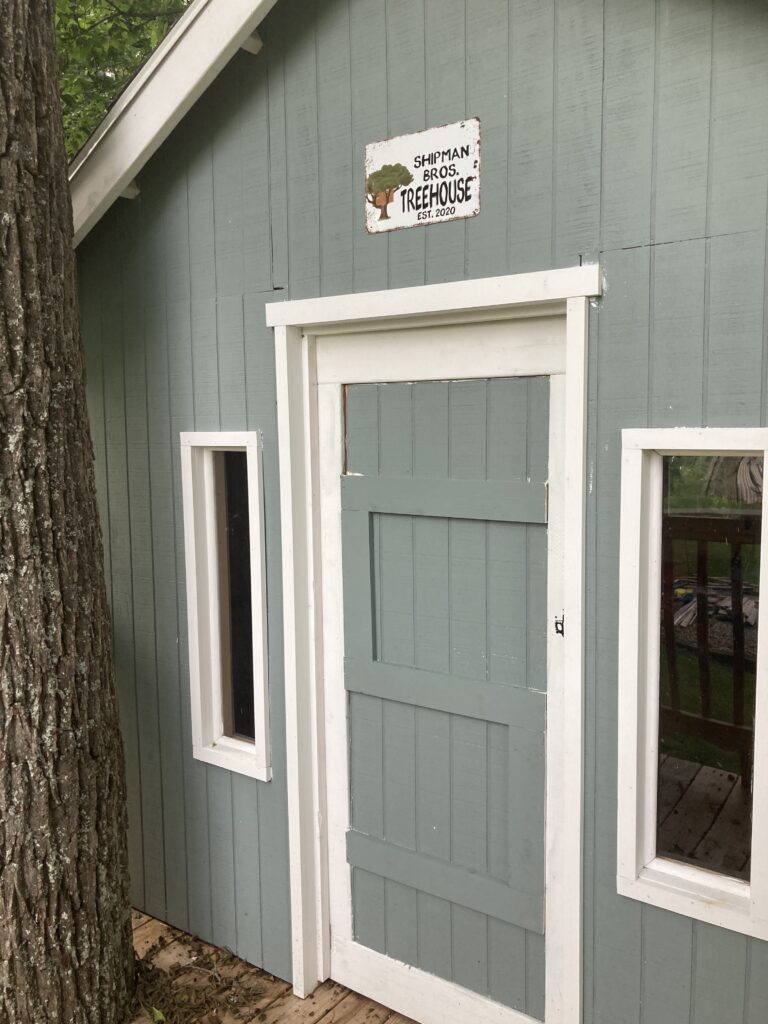
Just a little paint when it was all done and WE HAD A TREEHOUSE!
finishing touches for our family treehouse
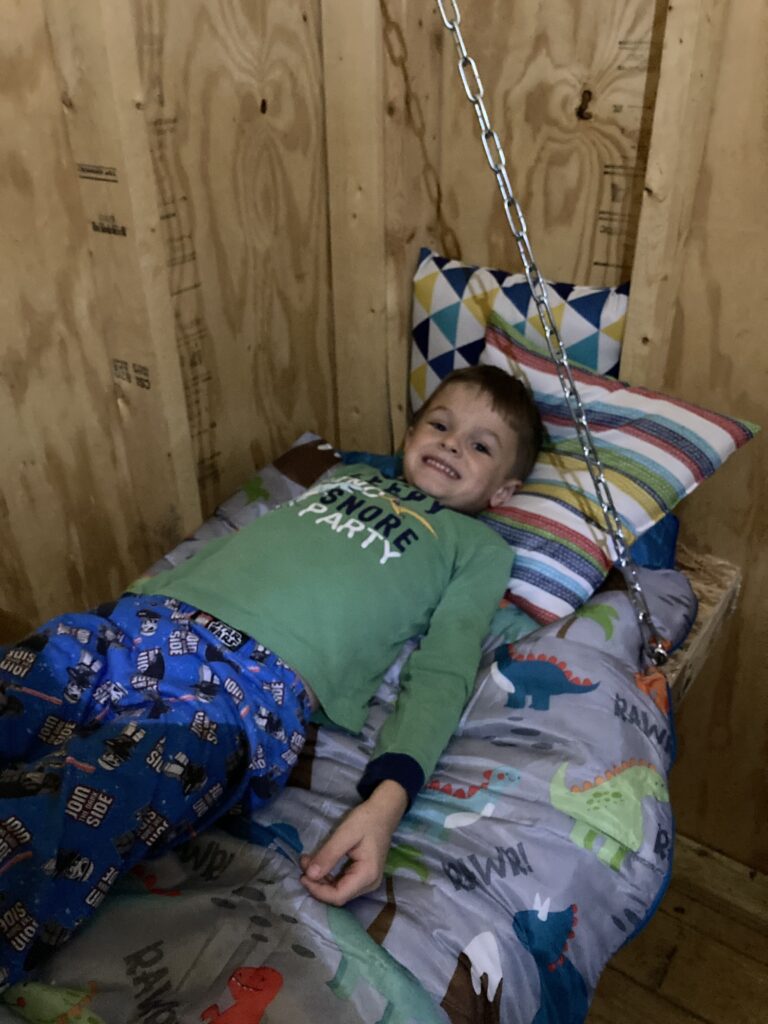
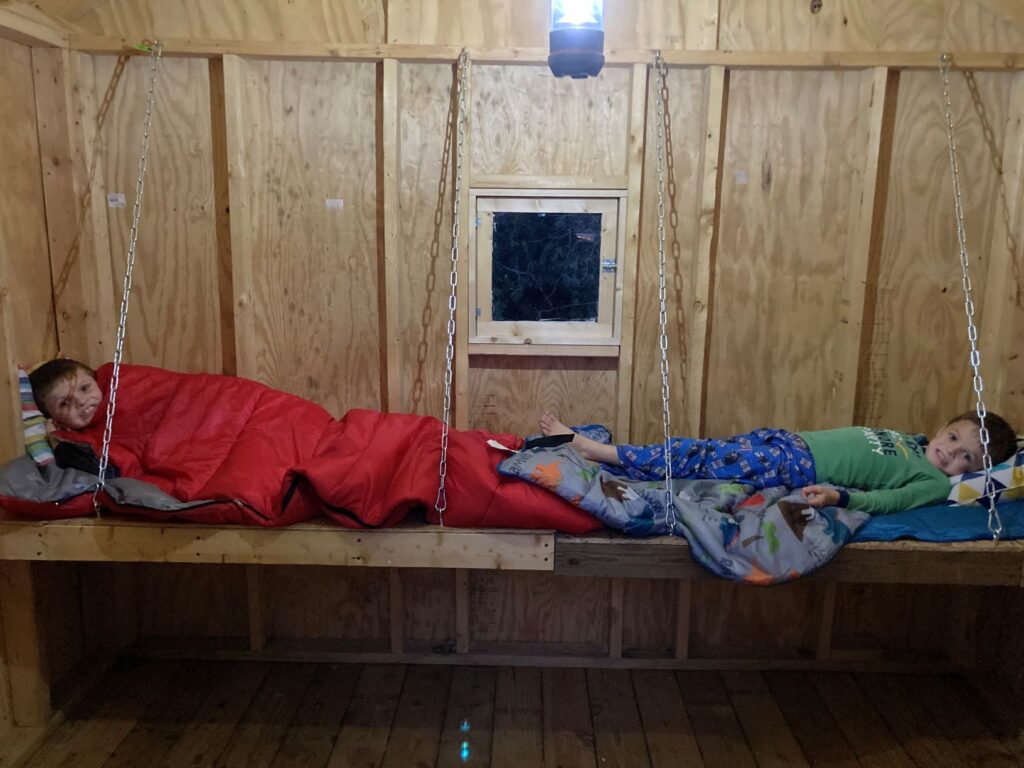
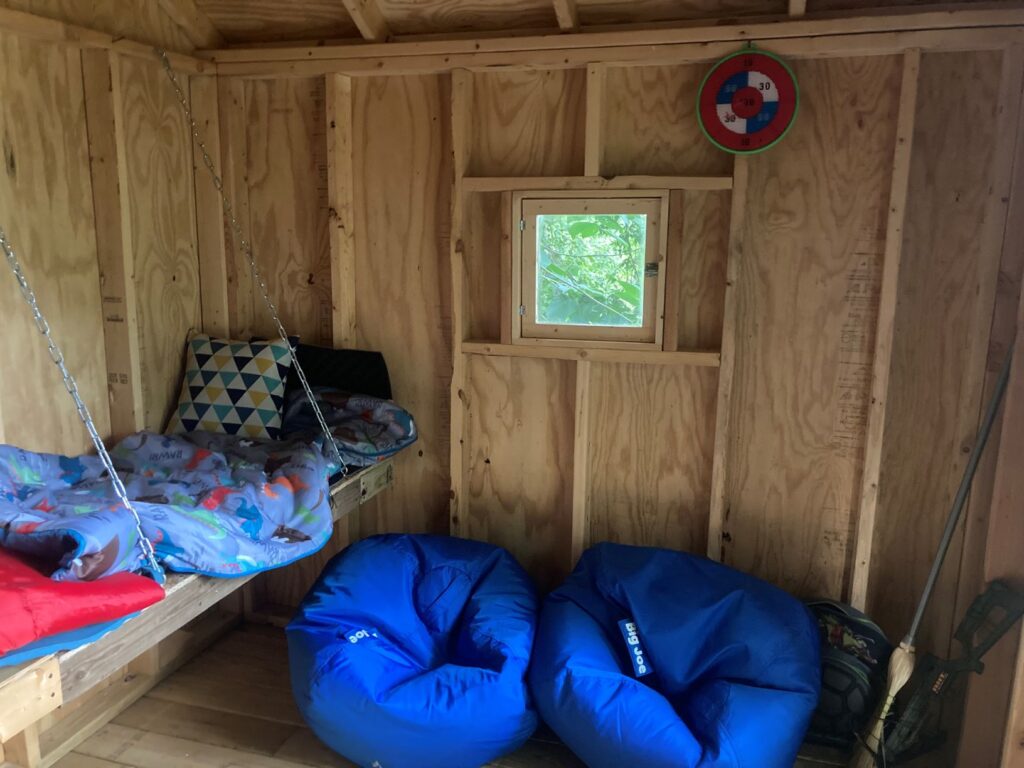
No treehouse is complete without super cool features. In addition to the rock climbing holds for the ladder, Josh had a great idea to build beds into the wall that will fold down for more floor space! Add a corner shelft, some sleeping bags, bean bags, and a dartboard and we had an AWESOME treehouse for making lots of memories.
After it was all done I tried to take it over for a backyard “she shed” on stilts…but I was quickly vetoed. 😛
So there you have it! Our backyard treehouse!
Feel free to share this post with other families.
Comment below with YOUR backyard childhood memories!
Need more ideas? Check out my Fun Family Favorite Activities with Kids post and explore our website for more ideas and advice.
Love it!! Such a cool treehouse and wonderful memory for the boys and Josh!
Thank you! They will have wonderful memories in it, I’m sure! If I don’t decide to take it over as my she shed 😛